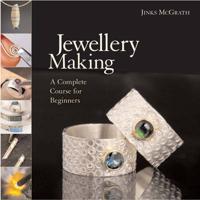
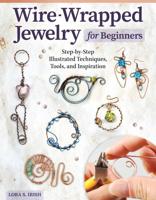
Publisher's Synopsis
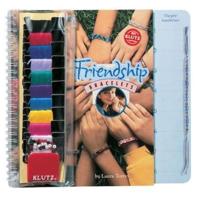
Friendship bracelets are incredible crafts that you can take anywhere! They're exactly first-rate for persons who have failed many times at gaining knowledge of knitting and crochet. And as a bonus, I experience like gaining knowledge of how to make a friendship bracelet is one of these rites of passage you constantly do at summer time camp, so this may simply be like figuring out how to journey a bike again. Step 1: What You'll Need: Embroidery floss/thin yarn scissors tape or pins/safety pins The embroidery floss can be the less costly type that comes in large packs like this! You do not want whatever fancy. Just make certain-stranded-stranded - in any other case, it may not be thick ample for a satisfactory bracelet. Lion Brand yarn additionally has these tiny little skeins of yarn known as perfect Bonbons. And lordy they are cute. The tape or pins will hold the bracelet in the region as you braid/knot the friendship bracelet. Step 2: Measuring + Cutting The widespread rule is to reduce portions of floss the size between your fingertips and shoulder - I would say proper round 30 inches works properly for me! I tried 25 with the first one and it reduces it lousy close. My wrists are proper around 6 inches, so let's simply say measure your wrist and then multiply that through 5 to be safe. You do not favor running out of floss after all that knotting and now not be capable to end it. If you are going to be making a bracelet that is greater than six strands it may be an accurate concept to add any other 6 inches, too! You'll be making more knots with each row, and therefore going thru every color a little quicker. Step 3: Determining the Number of Strands The perfect range of strands I've ever finished is eight. I usually go for six - six is best for me - dainty however detailed, and ends up being about 1/4-1/3 of an inch.: ) Keep in the idea that greater numbers of strands are tougher to maintain song of, and the bracelet can emerge as a little warped with greater strands, so you may want to block it (see the remaining step for information on how to do this!) if you prefer it to lay straight. And relying on what you'll like your sample to be, you can use two alternating colors, or each strand can be an exceptional color. You can get loads of particular patterns with very little effort! Step 4: How to Start the Bracelet Begin the bracelet by taking you to reduce strands of embroidery floss and tying an overhand knot in one end. Adhere this to a tabletop or your pants or a pillow and braid three inches down from this knot. Once you have completed your braid, make some other overhand knot at the backside of the braid. Step 5: Start the Knotting The way you make the ridged, woven searching floor of a friendship bracelet is via making plenty of small knots. First, you want to determine what order you desire your strands to be in. This will decide the order of the shade of your rows.